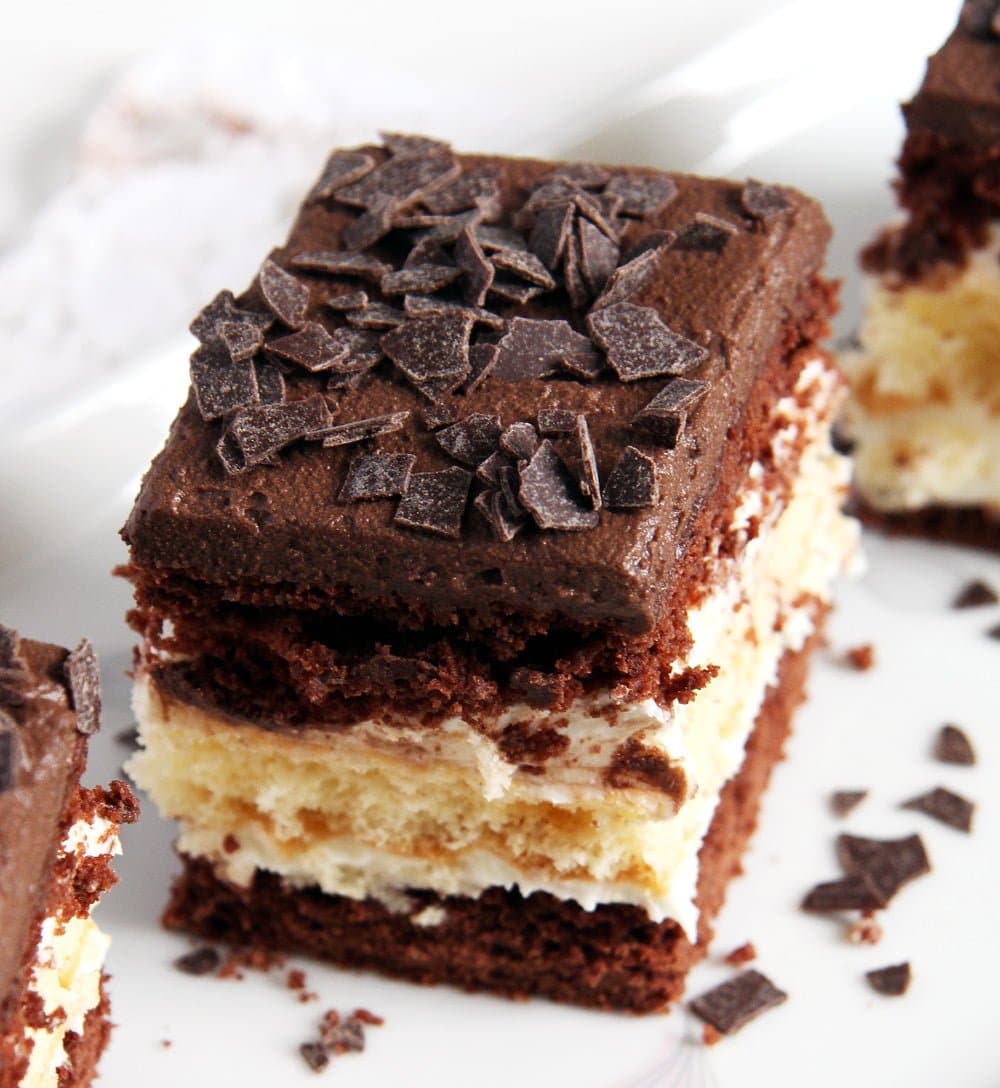
The Romanian Televizor cake is a chocolate vanilla cake with two cocoa layers, a soft vanilla sponge, vanilla buttercream, and a double chocolate topping.
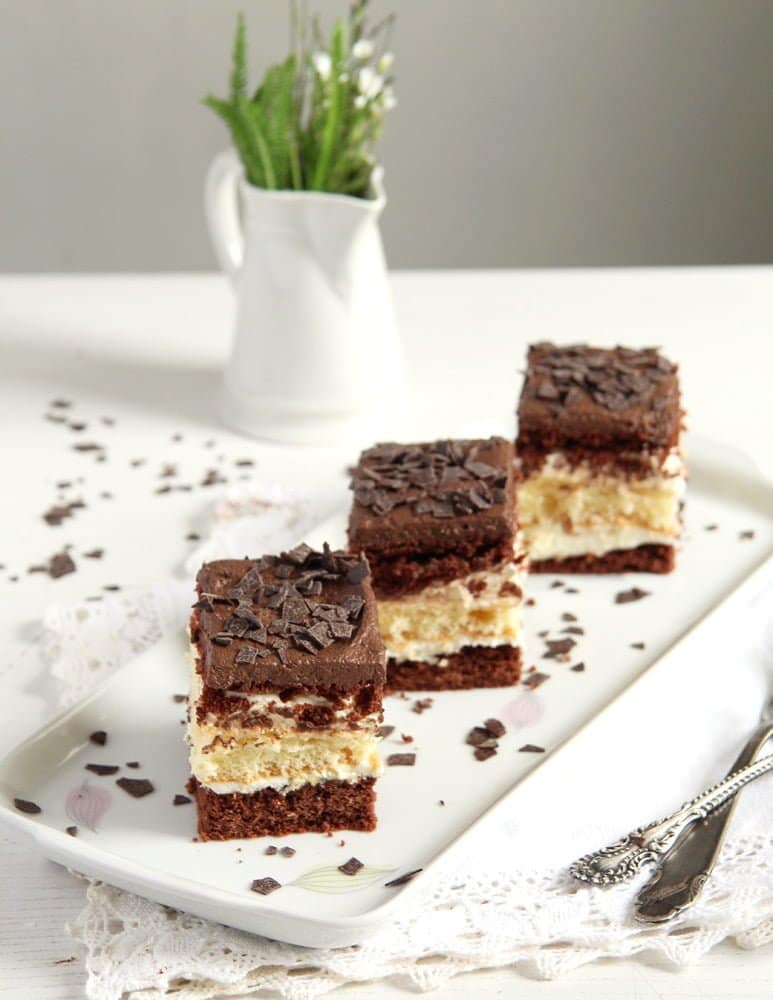
So, a cake named Televizor or television set is a bit unusual, I would say. It was the main reason why this cake stayed in my mind after I saw it somewhere online.
I was wondering why this name, and then I thought it should have something to do with the look of the cake. Old television sets from the seventies and eighties, I grew up with one of those myself, it was only in the early nineties that we got our first “modern” TV set.
The old one used to be a huge square black box with a large thick screen and some buttons on the right side of the screen. I can still remember the sound of those buttons when we turned on the TV or adjusted the sound.
Apparently, this chocolate vanilla cake is an old, famous Romanian cake as well. I have to admit that this cake is the only one in this series featuring well-known Romanian cake recipes like the Meringue Brownies – Negrese or the Romanian Biscuit Salami – Salam de biscuiti that I didn't know before.
I only realized that it is so popular because I kept stumbling upon one recipe or another on almost each and every Romanian blog I follow...
And in one conversation I had with my aunt about the Romanian Lemon Cake - Lamaita, she mentioned the layered vanilla chocolate cake without me even asking about it, she said she makes it quite often herself.
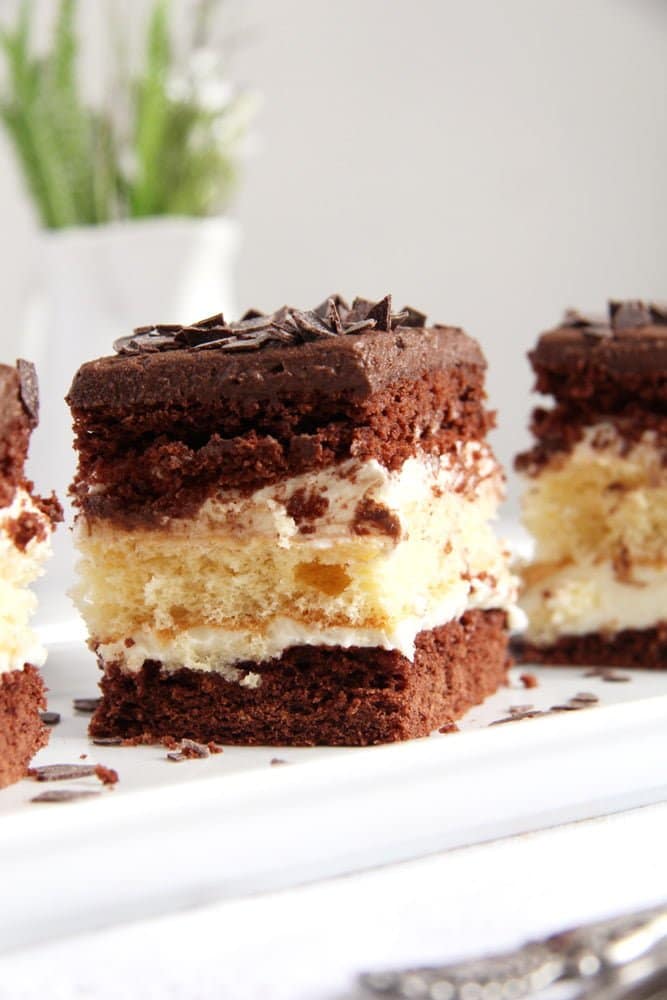
So I got the recipe and made this cake as well. So glad I did; we really loved it, all of us, and I must say that this is a particularly well-suited cake for the children. I was not able to impress my kids much with the Romanian Chocolate Cake Boema, which contains just too much dark chocolate for a child's taste, but these soft layers of sponge and vanilla cream were definitely a hit.
I recommend making the cake one day in advance and letting it develop the texture and flavors until the next day. The moisture of the vanilla buttercream will then have time to penetrate all those different cake layers, making the vanilla chocolate layer cake even better than it already is.
The recipe for this cake might seem a bit long, but please don't worry and try it if you like the way it looks, although it has a few different steps, they are all so easy, you will have no problem making the chocolate vanilla cake.
Kitchen scale
- Tip number 1 and the most important one as well: use a digital kitchen scale (the Amazon affiliate link opens in a new tab).
- I would not even attempt making this chocolate vanilla cake using cups. There is too much you have to measure, the cake is not the simplest one there is, and you are bound to get something wrong when using cups so many times and for so many steps.
Steps
- Follow the indicated steps and work methodically, one step after another.
- Don't start on two things simultaneously; finish one thing before you begin another. It will save you the stress.
- Start with the buttercream and ganache; they will need time to cool and rest overnight.
Vanilla buttercream
This Romanian or German-style buttercream tastes different from American buttercream. In my opinion, it is much better as it is less sweet, creamier, and milder. However, tastes are different. American buttercream is not suitable for this cake; it would be too sweet and too much of it.
When making the buttercream, it helps to use a stand mixer (the Amazon affiliate link opens in a new tab). The results are not better (using a handheld mixer makes the buttercream just as good), but there is a lot of mixing involved, so a stand mixer is just easier.
How to prevent buttercream from breaking?
The only drawback of the German/Romanian buttercream is that it can curdle/break. But there are a few things that can help against that:
- Use unsalted butter.
- It is best to use European-style butter because it has less water.
- Make sure that both the pudding and the butter are at the same temperature, that is, room temperature.
- To achieve that, leave the pudding cool overnight, and make sure you take the butter out of the fridge several hours before starting with the buttercream.
- Beat the butter thoroughly before you start incorporating the pudding. The butter should be white and fluffy; beat it for at least 3-4 minutes.
- Incorporate the pudding into the butter one tablespoon at a time, ensuring the buttercream is well mixed before adding the next portion.
- Never taste the buttercream while you mix the butter with the pudding. The spit on your fingers or spoon will cause the buttercream to curdle.
How to fix broken buttercream?
If the buttercream still curdles/breaks, don't despair; there is a way to fix that.
- Place the bowl with the buttercream on a pot filled with water, but make sure that the water doesn't touch the buttercream bowl (bain marie).
- Heat gently (making sure that the water doesn't come to a boil) while whisking continuously until the buttercream is smooth again.
Ganache
- The chocolate ganache also needs to be made in advance, as it will need time to cool and set.
- It will be very liquid initially, but not the next day.
- Place a piece of cling film or plastic wrap directly over the surface of the ganache and the pudding. This way, their tops will remain smooth and not form a skin.
Baking the cake layers
- Choose a 23x33 cm/ 9x13 inches baking dish and cut 3 sheets of baking paper.
- You will only need the baking dish for baking the sponge, but the cocoa layers have to be rolled to the same size as this pan so that everything is even in the end.
More challenging cakes
- Triple Chocolate Cake with Ganache - Cake Boema
- Romanian Harlequin Cake- Cake Arlechin
- Vanilla Buttercream Cake- Cake Tosca
- Cake Greta Garbo
- Hagrid's Book of Monsters Cake
Do you like this recipe?
Please leave a good rating in the recipe card below. Stay in touch through social media: Pinterest, Facebook, and Instagram. Don’t forget to tag #whereismyspoon when you try a recipe!Recipe
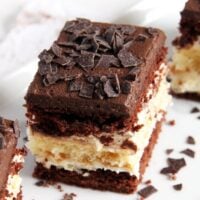
Layered Chocolate Vanilla Cake
Ingredients
- Vanilla buttercream:
- 30 g/ 1 oz/ ¼ cup cornstarch
- 35 g/ 1.2 oz/ ⅓ cup all-purpose flour
- 500 ml/ 17 fl.oz/ 2 cups full-fat milk
- 1 teaspoon vanilla extract to taste
- 125 g/ 4.4 oz/ ½ cup butter very soft
- 100 g/ 3.5 oz/ 1 cup icing sugar
- Ganache topping:
- 250 ml/ 8.4 fl.oz/ 1 cup heavy/double cream
- 125 g/ 4.4 oz milk chocolate
- chocolate flakes to sprinkle over the cake
- Cocoa layers:
- 125 g/ 4.4 oz/ 1 ¼ cups icing sugar
- 100 g/ 3.5 oz/ ⅓ cup + 1 tablespoon unsalted butter soft
- 1 tablespoon milk
- 1 tablespoon runny honey
- 1 egg See note
- 1 teaspoon vanilla extract
- 20 g/ 0.7 oz/ scant ¼ cup unsweetened cocoa powder
- 250 g/ 8.8 oz/ 2 cups + 1 tablespoon all-purpose flour
- 1 ½ teaspoons baking powder
- Vanilla sponge:
- 3 eggs separated
- 100 g/ 3.5 oz/ ½ cup sugar
- 2 tablespoons lukewarm water
- 100 g/ 3.5 oz/ ¾ cup + 1 tablespoon all-purpose flour
- 1 ½ teaspoons baking powder
- pinch of salt
Instructions
- I recommend using a kitchen scale to make this cake, cup measuring is too imprecise and might cause problems.
Start with the topping and the pudding for the buttercream, they should have enough time to cool.
Buttercream:
- For the pudding mix the flour and the cornstarch with a small amount of the measured milk, enough to obtain a thick yet pourable paste. Whisk well to avoid clumps.
- Heat the rest of the milk until it comes to a boil. Add the flour-cornstarch mixture while whisking all the time and keep whisking vigorously until the mixture thickens, it will only take moments.
- Remove from the heat, stir in vanilla extract to taste (the pudding is not sweetened yet, so don't get a shock, the sugar comes in with the butter), and place a piece of cling film directly on top of the pudding.
- Let get cool at room temperature, it will take several hours, so I prefer to make the pudding and the ganache one day in advance.
Ganache:
- Chop the chocolate very finely or process it in the food processor, place it in a bowl.
- Heat the cream in a small pot.
- Pour the hot cream over the chocolate and let stand for 5 minutes. Stir well until the chocolate is melted and shiny. Cover with cling film, let cool, and place in the fridge for several hours or overnight.
Cocoa dough layers:
- Preheat the oven to 180 degrees Celsius/ 350 degrees Fahrenheit.
- Choose a baking dish of about 23x33 cm/ 9x13 inches and cut 3 sheets of parchment paper. You will only need the baking dish for baking the sponge, but the cocoa layers have to be rolled the same size as this pan.
- Place the icing sugar, soft butter, milk, honey, eggs, vanilla extract, cocoa, flour, and baking powder in the food processor and process shortly until well mixed.
- Place one sheet of parchment paper on the working surface and place half of the cocoa dough on it. Press the dough to a rough rectangle with your hands, cover it with another sheet of parchment paper and roll it to a rectangle of the same size as the tin you will be using to bake the sponge.
- Remove the upper parchment paper and transfer the dough together with its lower parchment paper sheet onto a baking tray. Bake for about 10-12 minutes.
- In the meantime roll the second half of the cocoa dough just as explained before and bake as well. Let cool.
Vanilla sponge:
- While the second cocoa layer bakes, prepare the sponge mixture.
- Lightly butter the rectangular baking dish you chose before and line it with parchment paper.
- Separate the eggs. Beat the egg whites until stiff, slowly add the sugar and continue beating until the egg whites are stiff and glossy. In another bowl mix the egg yolks and the warm water. Carefully incorporate into the egg whites.
- In another bowl mix together the flour, baking powder, and salt. Sift over the egg mixture and incorporate it carefully with a plastic spatula.
- Pour the mixture into the prepared pan and bake in the preheated oven for about 25-30 minutes or until a toothpick inserted in the middle of the cake comes out clean.
Vanilla buttercream:
- Read the tips above before making the buttercream.
- To make the buttercream start by beating the soft butter until white and fluffy, about 3-4 minutes.
- Add the icing sugar and continue beating until fluffy.
- Slowly start adding the pudding, one tablespoon at a time while beating all the time. Only add the next tablespoon of pudding to the buttercream when the previous one has been fully incorporated.
Topping:
- Remove the ganache from the refrigerator about 30-60 minutes in advance. Beat the ganache until fluffy, taste, and add a bit of icing sugar if you feel it necessary (I didn't).
Assemble the cake:
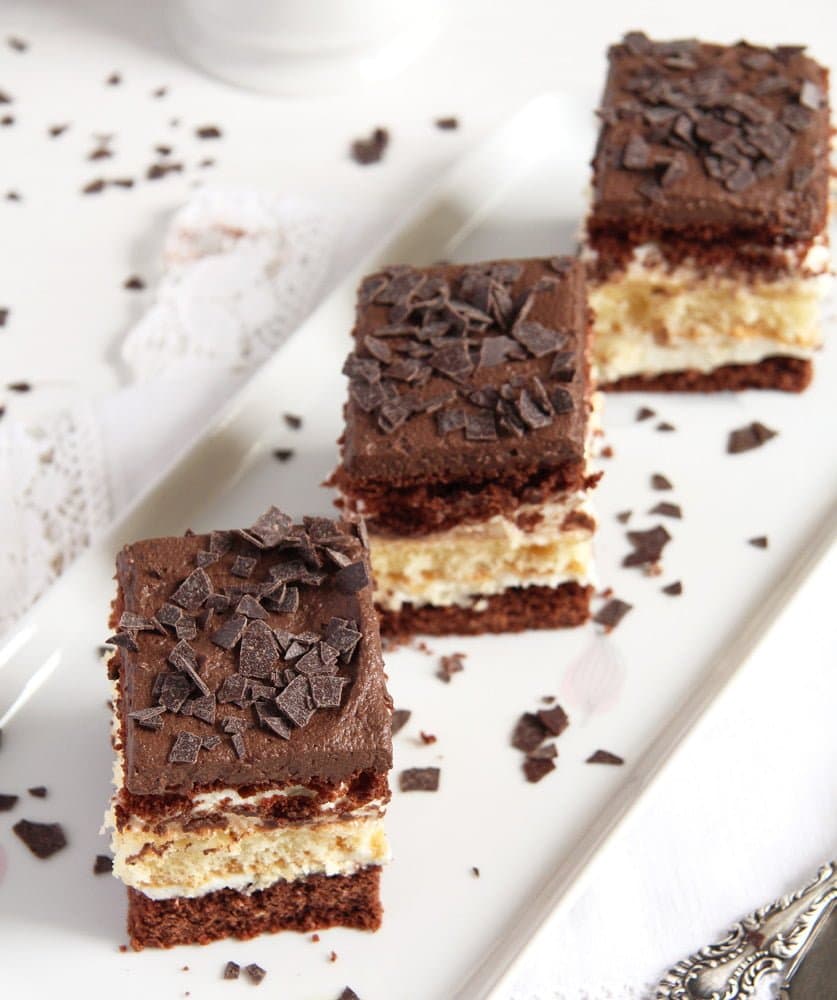
- Place one cocoa layer on a suitable rectangular serving dish.
- Spread half of the vanilla buttercream on top and level nicely.
- Place the sponge on top and cover it with the remaining vanilla buttercream.
- Place the second cocoa layer on top and press lightly.
- Spread the ganache on top and sprinkle the cake with the chocolate flakes.
- Cover carefully with some aluminum foil without ruining the topping and place in the fridge for at least 4-5 hours or better overnight.
- Cut into small squares and serve.




Rebecca L Sizemore says
Looks delish
MasterRusk says
Made this for a birthday. Easy to make, delicious moist cake, easy to work with icing. Made a great impression when the cake was cut and the layers revealed. A hit all around.
Adina says
No, the measurements are right, Carrie. The ganache is very liquid at the beginning, it will need hours to cool and set (like I've mentioned - overnight). The pudding is thicker yet rather runny when still warm, pudding is always stiff when cold as well. They both need time, that's why they're the first things you have to make. If you used the right ingredients and measured properly, they should both be fine.
Carrie says
I think your measurements are way wrong. I'm just starting this recipe and both frostings are watery soup.
Sissi says
Your family must be really happy with all those delicious sweet treats you bake! This one looks also irresistible.
Marvellina says
I'm not really a cake person but seriously...all your desserts, cakes, brownies making me want to take huge bites out of them
grace says
here you go with the layers again! and these layers are particularly magical--what great flavors! this looks like a perfect dessert.
Laura Dembowski says
This is seriously the cake dreams are made of - something for everyone and towering with layers.
Denise Browning says
The description and image of this Romanian cake sounds and looks simply divine. The type of dessert that my whole family would enjoy...
Dawn - Girl Heart Food says
What a gorgeous looking cake!! I think the time it takes to make it is totally worth it 🙂
Evi @ greenevi says
This looks beautiful again! I'm always so amazed by your baking skills!
Chris Scheuer says
This cake looks so festive and so moist! It would be perfect for a birthday celebration!
nammi says
Yummm can i have a slice please!!.
Angie@Angie's Recipes says
I miss those days that we could enjoy one extra slice of cream cake without having to worry about the waist line and sugar...this looks really super, Adina.